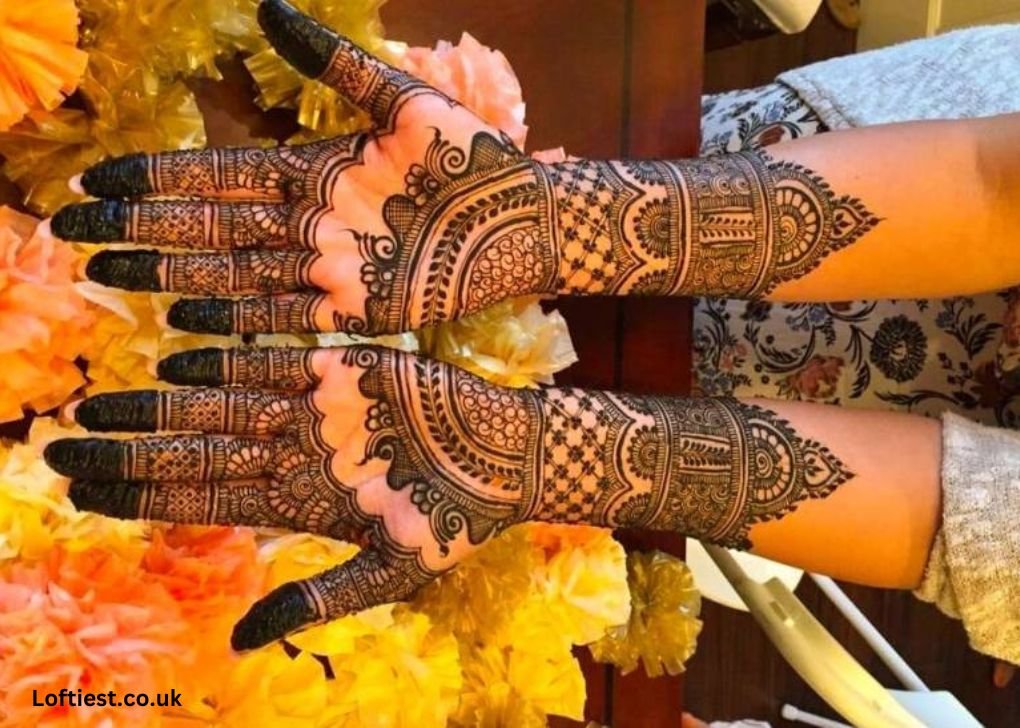
Mehendi design is a form of body art originating in India, where intricate patterns are drawn on the hands and feet with a paste made from a powdered herb. This art form has been practiced for centuries and is still popular today. If you want to learn how to do a perfect easy mehndi design, then this blog post is just the thing for you. In this article, we will go over some of the basics for creating the perfect mehendi design.
Gather Your Supplies
Before you begin your mehndi design, it’s important to make sure you have all of the supplies you need. This will make the process much easier and help ensure that your mehendi design turns out perfect. Some basic supplies you’ll need include:
- Mehendi paste: This is a crucial part of creating your mehndi design and should be chosen based on the type of design you want.
- Pencils: You’ll need these to trace your mehndi design onto your skin.
- A tissue paper or cotton swab: You can use these to wipe away any excess mehendi paste.
- A spoon: This will help mix the mehendi paste and keep it from drying out.
Choose Your Design
When it comes to mehendi designs, the possibilities are endless! From intricate, detailed patterns to simple, easy designs, you can choose whichever design suits you best. To find the perfect design for your mehendi, start by doing some research and finding inspiration.
Consider researching traditional designs, floral patterns, geometric shapes, abstract art, and more. After you’ve narrowed down a few ideas, decide which is the most fitting and begin to sketch it out on paper. For those looking for an easy mehendi design, a simple flower pattern or a mandala shape might be a perfect choice!
Draw Your Design on Paper
Once you have chosen your mehndi design, it’s time to draw it on paper. If you are using a complex pattern, consider tracing it onto transfer paper first so that you can easily transfer it to your skin without having to redraw it. If you are using a simple, easy mehndi design, you can either sketch it out directly onto the transfer paper or use a pen and paper.
Make sure to keep the proportions accurate when drawing your design, as this will make for a better-looking mehndi design. Once you are done, transfer your mehndi design onto your skin by pressing the transfer paper firmly against your skin. This will ensure that the mehndi design is accurately transferred and doesn’t get smudged.

Trace Your Design onto Your Skin
Now that you have decided on the easy mehndi design simple or easy design you want to use, the next step is to transfer the design onto your skin. To do this, you will need a fine-tipped mehndi cone and a steady hand.
Carefully trace the design from your paper onto your skin if you make a mistake. No worries! You can always use a wet cotton swab to rub away the mistake and try again. Once you have traced the entire design onto your skin, you can move on to the next step.
Fill in Your Design
Now that your design is traced onto your skin, it’s time to fill it in with mehndi. This can be a difficult step for beginners, but don’t worry mehendi designs can be as simple or as complicated as you want them to be.
If you’re feeling overwhelmed, start with a simple, easy mehndi design. Start by squeezing the mehndi cone so that the paste is released into the tip of the cone. Make sure to maintain pressure on the cone while moving it in a circular motion around the edges of the design. This will create a thick outline around your design. Once you’ve done that, fill in the design with small circular motions.
If it’s not perfect, don’t worry; practise makes perfect! If you want to add shading or texture, try filling in the design with horizontal or vertical lines. Finally, let your easy mehndi design dry completely before you remove it. Depending on how long you left it on, you can expect to see the design fading after a few days. Enjoy your beautiful easy mehndi design!
Let it Dry
Once you have filled in the easy mehndi designs, it is important to let the henna paste dry completely. This will ensure the best color payoff and the longest-lasting result. You can do this by leaving the paste on your skin for 4-6 hours or overnight.
During this time, be sure to avoid contact with water, as it can disrupt the drying process. If you want a deeper, richer color, you can cover the easy mehndi design with a mixture of lemon juice and sugar.
After it has been left for 4-6 hours, gently scrape off the dried henna paste with a blunt object such as a butter knife or the back of a spoon. Once all the henna paste has been removed, you will be left with stunning easy mehndi designs that are simple and easy to achieve!
Conclusion
Mehendi designs are a fun and beautiful way to decorate your hands. Whether you’re looking for a mehndi design that’s simple or intricate, it can be easy to achieve your desired look with the right supplies and a bit of practice. With this guide, you now have all the tools necessary to create a stunning mehendi design that will be sure to wow your friends and family. So go ahead and give it a try and don’t forget to share your masterpiece with us!